
A WooCommerce chatbot can help shoppers find the right product and give customers a quick answer when they ask, “Where is my order?” With WPiko AI Chatbot Pro, product recommendations use a synced copy of your catalog, while order status comes from a live WooCommerce lookup.
This guide shows how to set up both features and test them with the questions shoppers actually ask. Use a few products and a test order to check the replies before you make the chatbot available to customers.
What you need before you start
You’ll need a WordPress site with WooCommerce active, the free WPiko AI Chatbot plugin, and WPiko AI Chatbot Pro with an active license. The chatbot uses your OpenAI API account, which bills separately for usage.
If you haven’t connected OpenAI or tested your first reply, start with how to add an AI chatbot to WordPress. Then come back here to connect your store.
1. Connect WooCommerce and sync your product catalog
- In WordPress, open WPiko AI Chatbot → AI & Training → AI Settings → Model & Knowledge. Under Train AI assistant, click WooCommerce.
- Turn on Use WooCommerce data in the chatbot.
- Under Product catalog → Product data, open Choose fields. Select the fields your shoppers ask about.
- Click Sync now and wait for it to finish. Open the chat and ask about a product you can verify against its WooCommerce listing.
Include Product URL so shoppers can open the listing. Include Price and Stock status if you want the bot to answer those questions. Add Attributes if shoppers ask about size, color or material. For example, if shoppers ask for a daypack with a laptop sleeve, put the sleeve size in a description or attribute that you sync.
Product answers use the last successful sync. If you change a price before a sale, run Sync now and ask about it again. Use Auto-sync to refresh the catalog on a schedule. If you want to see which product data is sent to your OpenAI knowledge base, use Preview → Download products JSON. See the Product Sync documentation.
2. Show recommendations as product cards
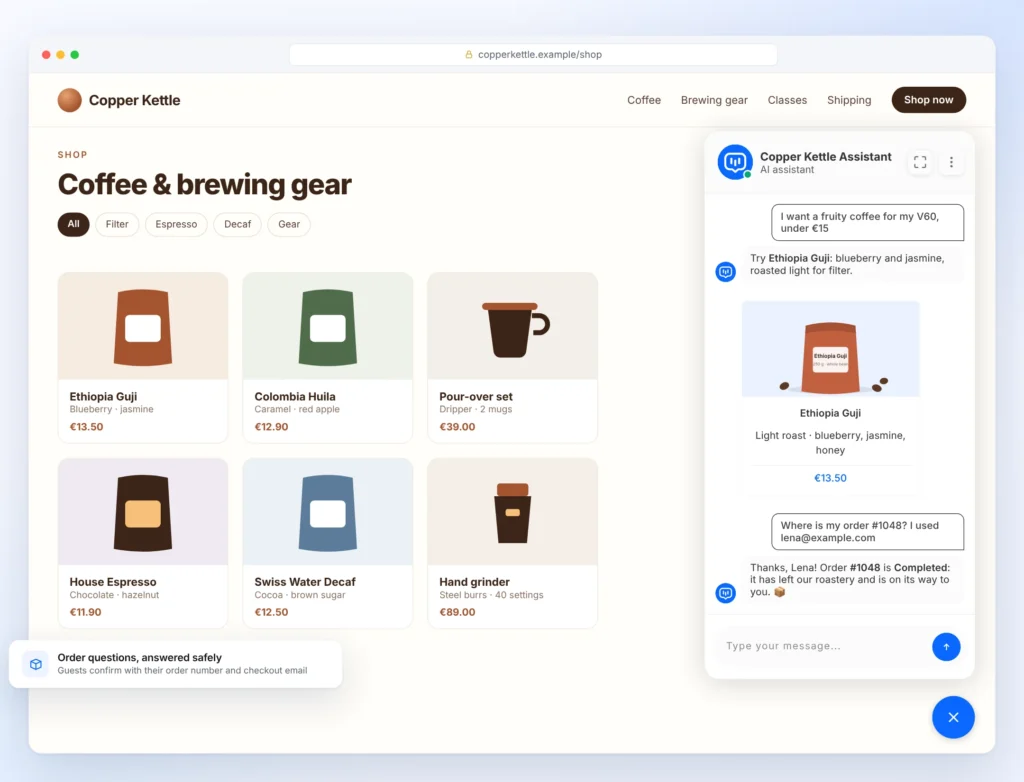
Once the catalog is synced with Product URL included, open WPiko AI Chatbot → Leads & Sales → Product Card. Turn on Enable product cards, choose the fields to display, then save. Product cards can show the image, title, description and price. Open one from the chat on a phone to check that it leads to the right product. See the product card setup guide.
3. Enable live order lookup
Return to the WooCommerce panel under Model & Knowledge. In Order assistance, set Order lookup to On. Use Signed-in order details → Choose fields to control which extra details customers can see for their own orders.
| Who’s asking | What they provide | What the chatbot can show |
|---|---|---|
| Signed-in customer checking their own order | Order number | Order number, status and any extra fields you enabled |
| Guest or signed-in customer checking an order outside their account | Order number and the email used at checkout | Order number and basic status, when both details match |
Tracking numbers or links require a signed-in customer checking their own order, the corresponding field enabled in WPiko, and a tracking number on that order from a supported source. The lookup reads the order directly from WooCommerce when the customer asks. Order records stay out of the chatbot’s knowledge base. See Order Assistance for supported tracking sources and custom order numbers.
4. Test your WooCommerce chatbot before launch
Use a test order and a customer account you control. Try the guest checks in a private browser window so your WordPress login doesn’t affect the result.
| Try this | What to check |
|---|---|
| Ask for a product under a specific budget or with a particular attribute. | The suggested product matches the request, and its link, price and availability agree with the store. |
| Change a test product’s price, run a sync and ask again. | The chatbot uses the updated price after the sync completes. |
| Ask about your test order while signed in. | The status agrees with WooCommerce, and the reply shows only the extra fields you enabled. |
| Look up the same order as a guest with the correct checkout email. | The reply gives basic status. Check that it omits tracking, items and totals. |
| Repeat the guest lookup with a different email. | The reply gives no order information and points the customer to a next step. |
If a reply is wrong, trace it back to the source. For a product answer, check the fields you selected and when the catalog last synced. For an order answer, check the test account, checkout email and order number. If you use a custom order number plugin, verify that the number on the receipt resolves to the WooCommerce order ID.
Start with the questions your store gets every week
Pick one question shoppers ask before buying and one question customers ask after checkout. Use those as your first tests, then review real chats for missing product details and order questions that still need a person. Once the chatbot is live, use this guide to measuring chatbot performance to check whether visitors are getting the answers they need.
Ready to connect your catalog and enable order lookup? See WPiko AI Chatbot Pro plans.